Advanced TUIs
In the limit, compose.mk can help you to script custom console applications that potentially involve many containers, and by using mk.self you can "compile" them to stand-alone executables. This works best for building things like dashboards, but it's even possible to build things that resemble portable, project-specific IDEs.
Extreme customization of the TUI isn't well documented yet, but this page has a few hints and an overview of existing examples.
Extensions & Scripting
As a minimal example of extending the TUI, let's throw together some support for yazi, a pretty cool terminal-based file-manager. It supports lots of stuff2, including file-previews, skins, and plugins.
Consider the following Makefile:
#!/usr/bin/env -S make -f
# Minimal demo for extending the embedded TUI.  See docs for more discussion.
# Part of the `compose.mk` repo. This file runs as part of the test-suite.
#
# USAGE: ./demos/tui/extension-1.mk

include compose.mk

# Look, a nixos container with yazi
# https://yazi-rs.github.io/docs/installation/#nix
define Dockerfile.yazi
FROM nixos/nix
RUN nix-channel --update && nix-env -iA nixpkgs.yazi
ENTRYPOINT ["yazi"]
endef

# Look, this maps a container invocation to a target
# This works the way you'd expect without the TUI too,
# so we leave it as a public target.
widget.yazi:
    cmd="demos/" tty=1 \
        ${make} docker.image.run/compose.mk:yazi

# Main top-level / public entrypoint.
# Extending the TUI usually starts with a call to `tux.open`,
# including basic information about the backend `tmux` session.
# We opt for horizontal layout, and instantiate 2 of the yazi-widgets
__main__: \
    docker.from.def/yazi \
    tux.open.horizontal/widget.yazi,widget.yazi
Running this opens a split-screen console with both panes showing file browsers.
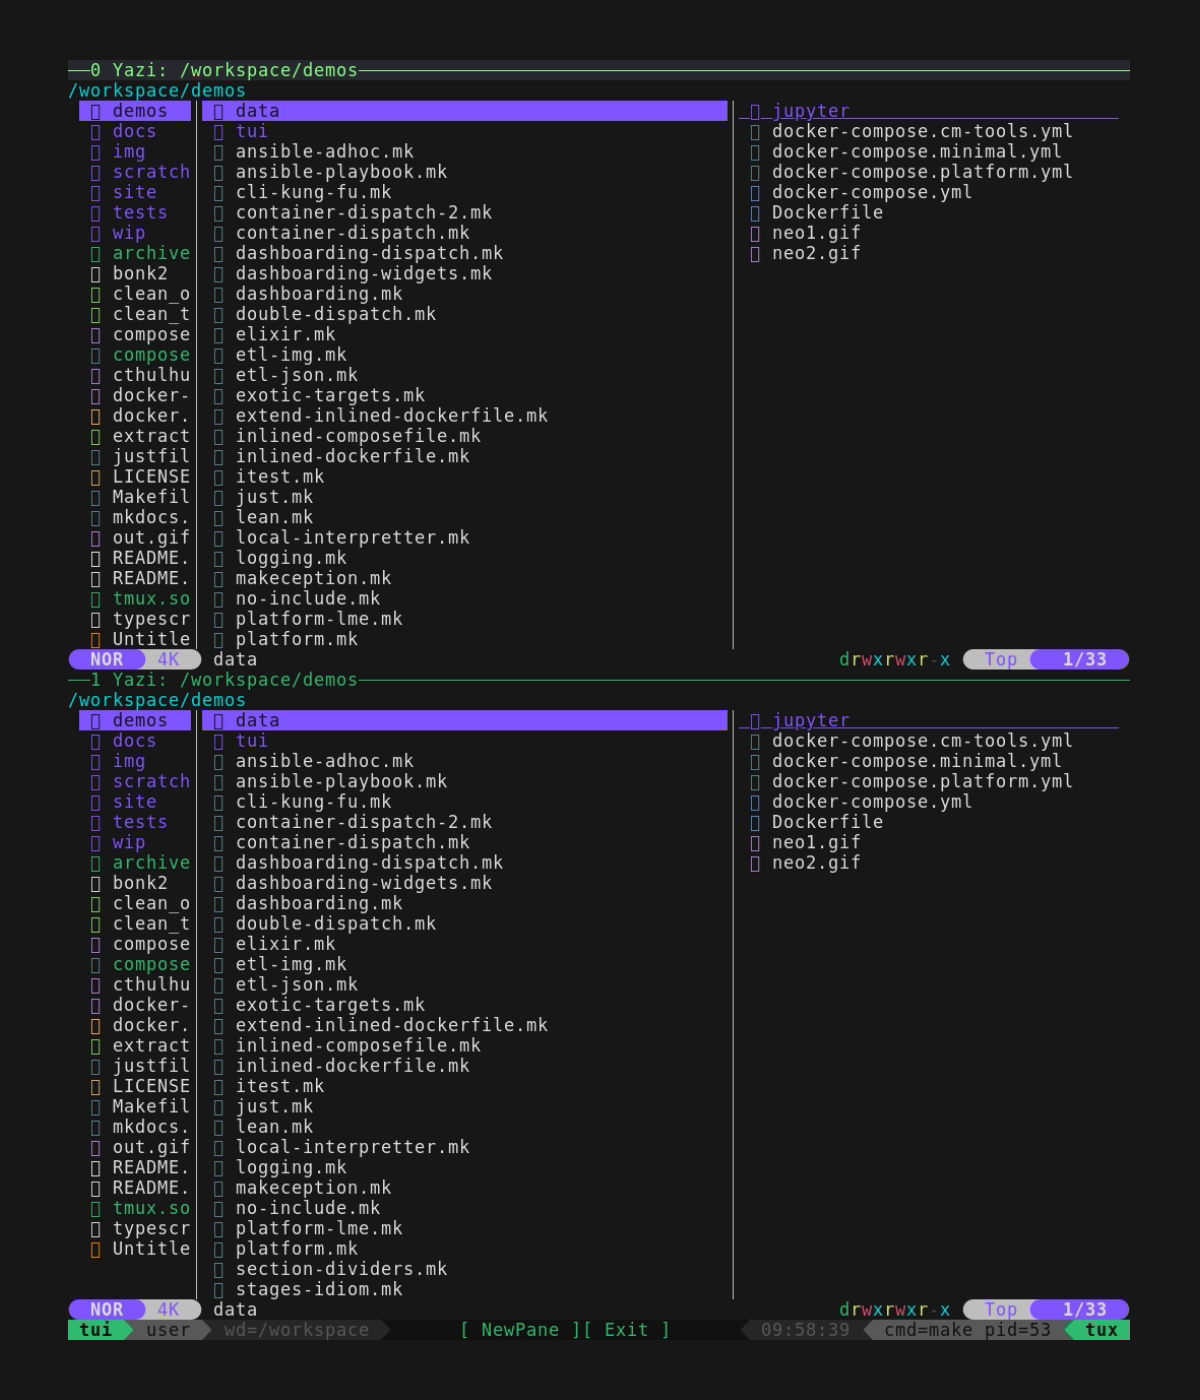
Closer look
The eagle-eyed reader will have noticed that the shells we opened are running inside the TUI container. The project folder is already volume-mounted though, as is the hosts docker-socket. From here, you can imagine setting different working directories for each browser, or even different yazi builds with very different configuration and plugins.
So you can see that while things like vim and emacs don't ship with the default container that enables the embedded TUI.. we don't really need that because it's already extensible. Adding the editor of your choice can be accomplished with the same technique we used for the file manager.
Understanding Widgets
We've seen previously that "widgets", i.e. TUI pane-content, are nothing very special. Whether it's adding a file browser widget-from-container or just working with your your existing automation tasks, pane content declarations are ultimately just targets like everything else is.
In a TUI though, some targets are more useful than others, and typically you might want targets that loop, like we saw before in the docs for low-config TUIs. Looping tricks with flux.loopf/<target> and friends can also restore pane content in case of crash, like say a hiccup in networking activity.
For this example we'll add a console-friendly, full-featured webbrowser, using carbonyl.
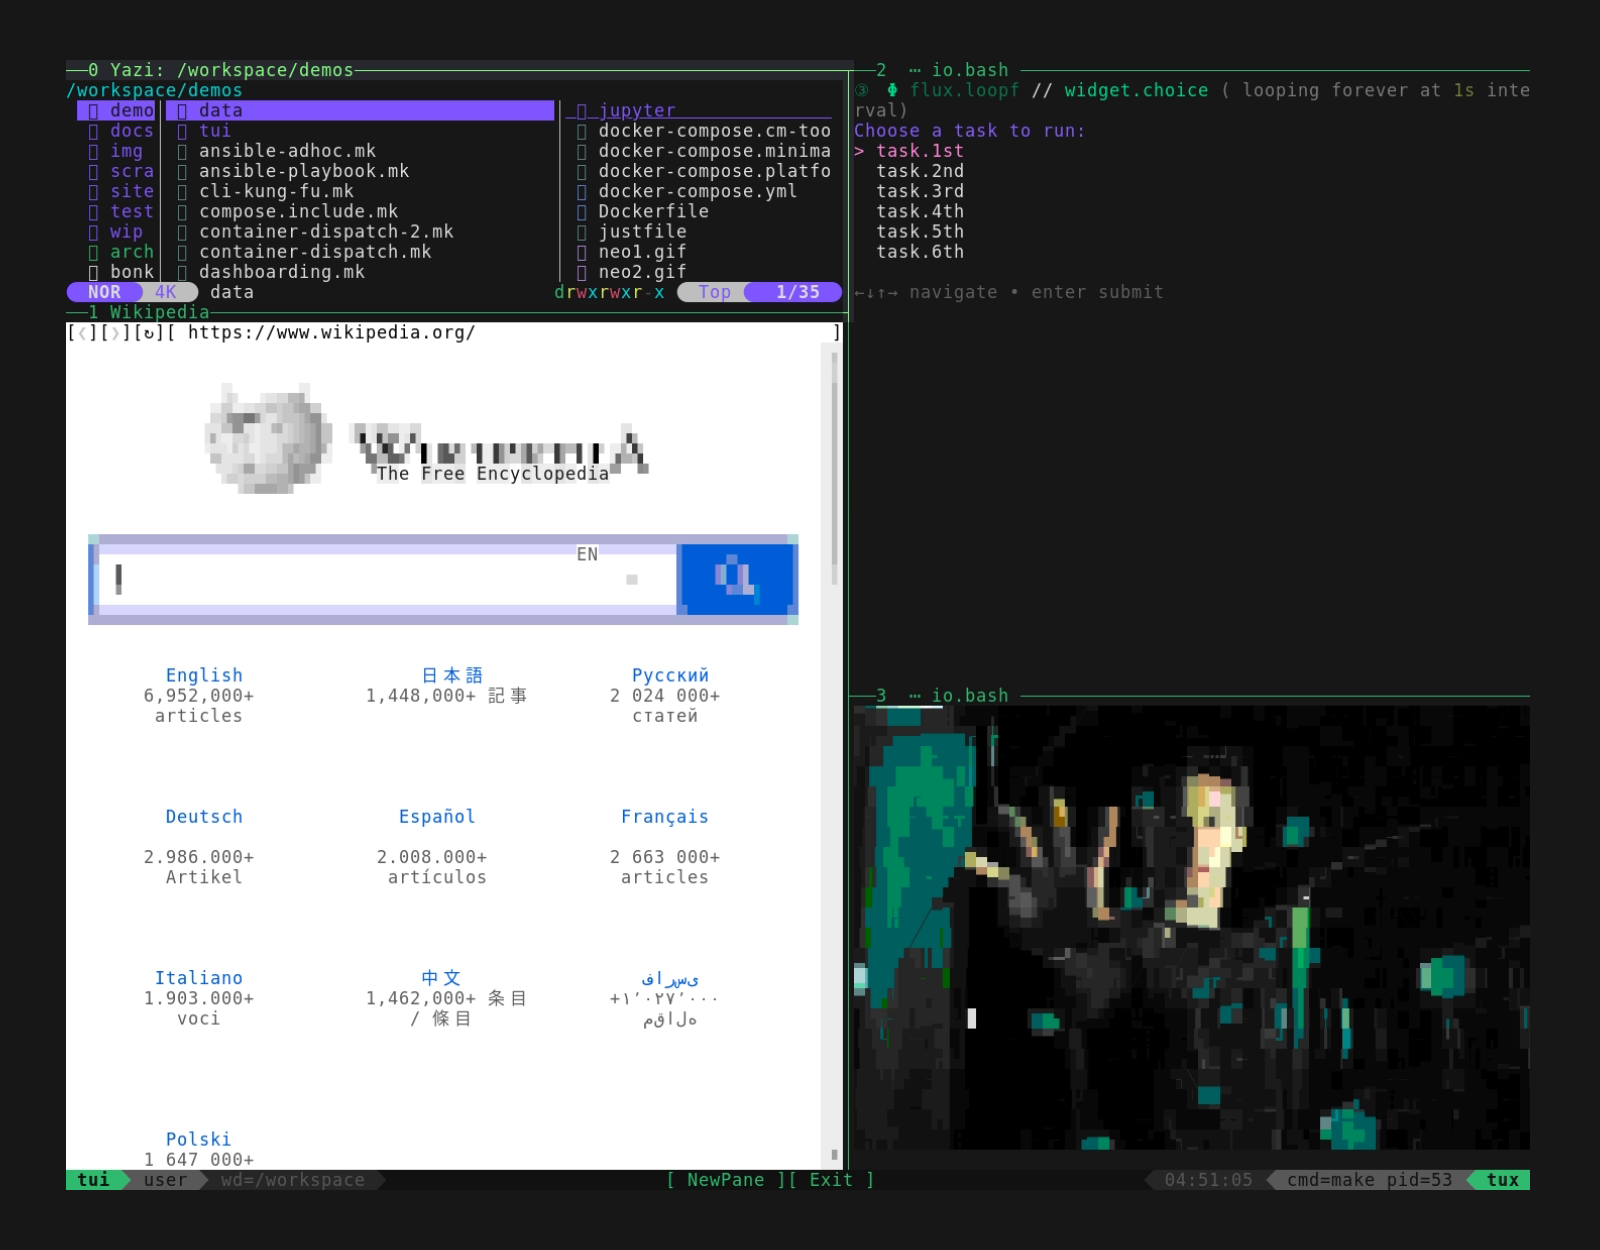
Although the resolution is low.. the browser actually works and includes mouse support, and the gif actually plays =P
The code for the above looks like this:
#!/usr/bin/env -S make -f
# Building on demos/tui/extension.mk. This keeps the yazi file-browser
# from the first version, and adds a target-selector and a web browser.
# Part of the `compose.mk` repo. This file runs as part of the test-suite.
#
# See the docs for more discussion:
#  https://robot-wranglers.github.io/compose.mk/advanced-tuis
#
# USAGE: ./demos/tui/extension-2.mk

# Pickup where the first extension left off
include demos/tui/extension-1.mk

# Starts a webbrowser as a widget.
widget.browser:; url='http://www.wikipedia.com' ${make} tux.browser

# Gets an animated gif for use as a widget, just by naming the location.
widget.logo: .tux.widget.img/demos/data/neo2.gif

# A chooser widget using `gum choose` that works with or without `gum`.
# If we're dockerized, getting the choice back from a fake tty is hard,
# but using the `io.selector` idiom makes it simple.
#
# In this cases the choices are exactly the `task.*` targets below,
# so we just execute the chosen target, pause, and exit.
widget.choice:
    header="Choose a task to run:" \
    ${make} io.selector/self.tasks.list,flux.apply

# Loops the simple choice widget forever
widget.chooser: flux.loopf/widget.choice


# Helper to return the targets matching "task.*" pattern
self.tasks.list: mk.targets.filter/task.

# Fake tasks to populate the chooser. These are only
# placeholders and just print a banner with their name.
task.1st:; label=${@} ${make} io.draw.banner
task.2nd:; label=${@} ${make} io.draw.banner
task.3rd:; label=${@} ${make} io.draw.banner
task.4th:; label=${@} ${make} io.draw.banner
task.5th:; label=${@} ${make} io.draw.banner
task.6th:; label=${@} ${make} io.draw.banner

# Main top-level / public entrypoint.
#
# Extending the TUI usually starts with a call to `tux.open`,
# including basic information about the backend `tmux` session.
# We opt for horizontal layout, and reference the widgets so far.
widgets:=widget.yazi,widget.browser,widget.chooser,widget.logo
__main__: docker.from.def/yazi tux.open.spiral/${widgets}
The browser container defaults to using the host network. This is used elsewhere in the notebooking demo to create a TUI for jupyter-lab.
Another interesting possibility is using the browser without relying on container port-forwarding and the host's network.. this way you can get visibility and interaction into otherwise completely sandboxed docker-compose networks. This trick is used in the demo for hermetic GUIs.
Custom Geometry & Dynamic Panes
You can setup a custom layout by just exporting a magic value for the geometry variable. This variable is respected by targets such as tux.open/<targets> and ultimately acted on by tmux. 1
But the easiest way to get started with custom geometries is to do something like this:
- Setup your TUI initially to use the built-in spiral/horizontal/vertical layout that's closest to what you want.
- Start your app and manually rearrange the pane sizes to suit. There's a few ways to do that, but you probably want
Alt+ arrows keys to resize existing panes. (See also the tmux docs and the compose.mk keybindings overview) - Add new panes using the 'New Pane' button at the bottom of the TUI, or
- Add new panes by right clicking an existing pane and choosing split-horizontal or split-vertical
Once your geometry is how you like it, run ./compose.mk .tux.geo.get > .tmp.geo from inside the TUI. Exit the TUI, copy the magic string from the file, and add a line like export geometry=... inside your code. Note that this preserves relative geometry for the number of panes that you are using at the time of the snapshot. If you added panes in the TUI, you need to adjust your code to launch and populate the same number of panes! If you want specific contents in specific panes, just adjust the order of the arguments for tux.open/.
Environment Variables
Here's a list of environment variables related to the TUI.
$ ./compose.mk io.env/TUI
TUI_BOOTSTRAP=tux.require
TUI_COMPOSE_FILE=.tmp.compose.mk.yml
TUI_CONTAINER_IMAGE=compose.mk:tux
TUI_INIT_CALLBACK=.tux.init
TUI_SVC_BUILD_ORDER=dind_base,tux
TUI_SVC_NAME=tux
TUI_THEME_HOOK_POST=.tux.init.buttons
TUI_THEME_HOOK_PRE=.tux.init.theme
TUI_THEME_NAME=powerline/double/green
TUI_TMUX_SESSION_NAME=tui
TUI_TMUX_SOCKET=tmux.sock
Implementation Details
To keep compose.mk itself self-contained, the base container for the TUI is actually inlined, and it is unpacked and built only on demand. For the exact specification, see the source and look for ${TUI_COMPOSE_FILE}.
Note that the base container is required for a few use-cases that are not, strictly speaking, the TUI. (For example io.figlet.)
To ensure the TUI container is built before trying to use it, use tux.require as a prerequisite target. The TUI container is cached by default after the initial build, but you can force purge/rebuild by using force=1 ./compose.mk tux.require.
References
-
For that matter, if you're already knowledgeable about scripting with
tmux, then you can use it directly andcompose.mkwill try to stay out of the way.. see also the env-var forTUI_TMUX_SOCKET. ↩